| Welcome
to the “Small Business Template Tutorial” for Adobe Photoshop
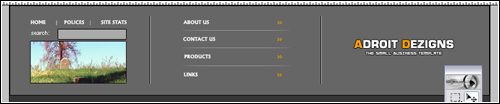
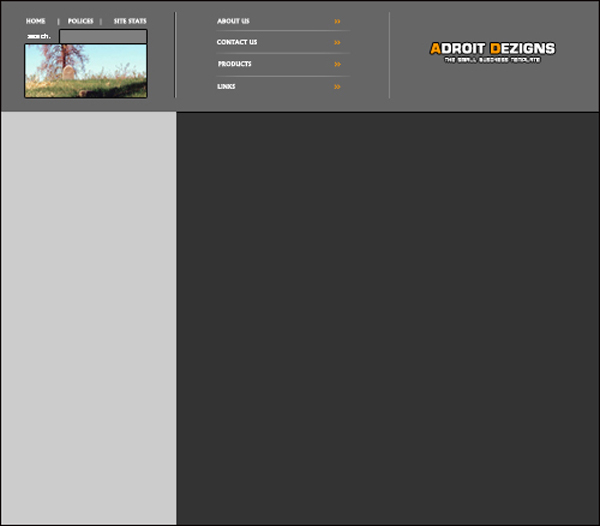
7 If your looking to build a website for your small business, you’ve found the right place. MY FINAL RESULT 1) In order for your webpage to fit all resolutions, make a new document with a transparent background that is 800 pixels wide and 700 pixels tall. 2) On your background layer, using your paint bucket tool, fill the
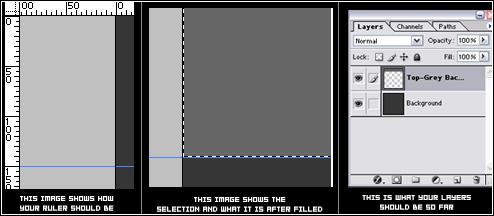
background with color “333333” 3) Create a new layer; name it “Top-Gray Background.” When naming layers, you should always think about their page position, and a one or two word description so you can find it later if you have to edit something. 4) Select the “Top-Gray Background” layer. Next go to View>Rulers and make sure they are checked. From the top ruler, drag a guide to the 150 pixel mark vertically. (See picture for example) Select the area above it. Next select your paint bucket tool and fill the area with color “666666.” Deselect your selection. See image below for review of this step.
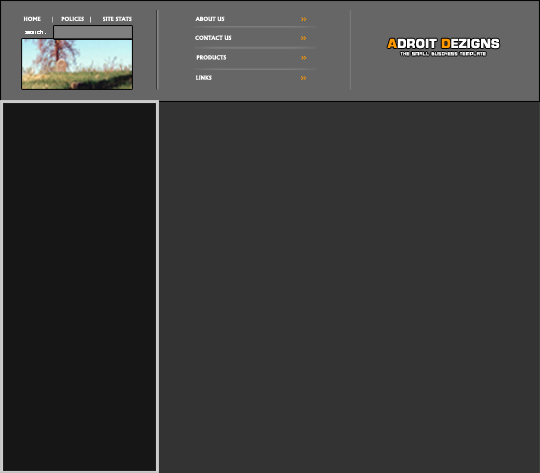
5) Now we are going to add the basic lines, of the top grey bar to divide it into three sections. First clear your guide by going View>Clear Guides. Now, we are going to add more guides. From the left side, drag a ruler horizontally to the 234 pixel mark and the 519 pixel mark. They should be pretty exact.. 6) Create a new layer, name it “Top-BlackDividers”. Now,
choose your pencil tool, and set it to one pixel on black foreground.
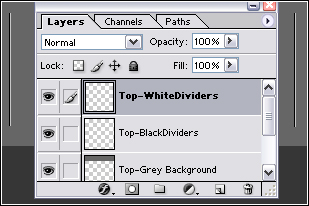
Along your guides, draw a line with a small space at each end. (See
picture). Duplicate this layer by right clicking on it, and rename
the new layer “Top-WhiteDividers.” Nudge this layer one
pixel to the right. In order to change the lines from black to white
go to Image>Adjustments>Brightness-Contrast and do +100 brightness.
Repeat this step. See image for visual of current progress.
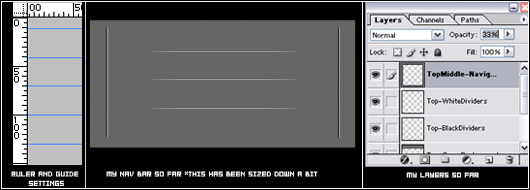
7) Create a new layer. Name it “TopMiddle-NavigationSeparation.” We will now create the dividers between your links. I am going to have a 30px gap which will allow me to have 7 total links. In this step we will create 4 and the final three will be in the next step. If 7 links is good, use these guide settings. Drag 5 guides to these locations, which should space them evenly. Ruler 1- 10px Along these guides, draw 1 pixel white lines with the pencil tool along guides 2-4. Clear your guides and see what you have created. In the picture below, I turned down the opacity and made the end smoother with my eraser. This is up to you! Experiment however you wish.
10) Now, go to your layers palette, and while holding CTL, click on Left-Box Content Background layer. This should load the selection. Go to select, Modify, contract by 5 pixels. This should decrease the selection size by 5 pixels on all sides. If it does not get smaller on all sides, manually shrink them by using the marquee tool and holding alt. Once you have your selection, create a new layer named “Left-Box Content Fill” and use your paint bucket tool to fill this area with color “161616” My image looks like this:
11) The box you created in steps 9 and 10 is great for News and Announcements. As well, this could be a place for sponsors. I will leave it up to you. I have added some filler text and pictures to make it look better. Here is my example 12) We are almost done. We must create two more boxes like we did in steps 9 and 10. For the first box, create a new layer and name it “Middle-ContentupperBackground” Next, drag the guides from the top to 150 and 325. Drag from the left to 234 (the same as before.) Select the rectangle it makes with the edge and fill it with color “CCCCCC”. Apply these layer settings. 13) Create a new layer and name it “Middle-ContentUpperFill. Go to Select>modify contract 5 pixels. If it does not contract all sides, do it by hand with your marquee tool. Fill your new selection with “161616.” Your template should look like this. 14) This step is optional, but depending on the amount of content your site will have, you might want to divide the box we just created in two as shown here. 15) Clear all guides if you haven’t already. Fill the Remaining area left with “CCCCCC” and do the same as you have before to create the last box. This last box is for you main site content and should change with every page. After you have added the content and your finishing touches, you have yourself a very nice looking small business template. I Hope
my tutorial helped, and enjoy customizing your result to your liking!
This tutorial is property of Adroit Dezigns. Do not post it
anywhere else without my permission. Please take a moment to
register on our forum for capabilities such as a request section for
signatures and an arcade!
|
||