| |
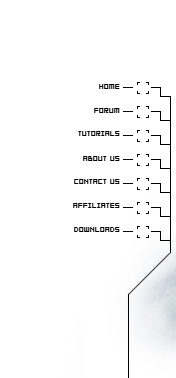
Simple Sidebars
Printable Version
-In
this tutorial, you will learn how to make cool sidebars for you webpage.
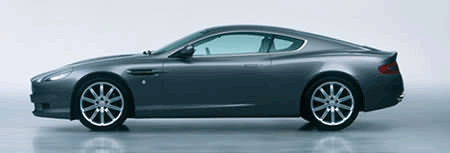
First off, you must open a photo in photoshop.
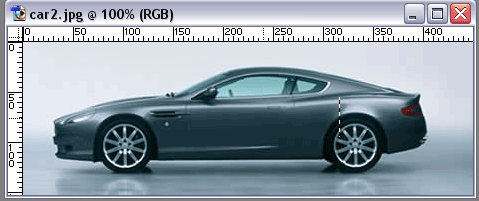
- Now, select your rectangular marquee tool  and
apply these settings at the top. and
apply these settings at the top.

After you have set your marquee tool to these settings, select an
area where the image changes colors frequently. After this, press control
+ c to copy the selection. Look in the image for a clear explanation.
Now, Create a new document with these settings.

With a white background layer, create another layer and name it sidebar
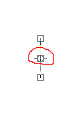
one. On this new layer, press control+v to paste. Now, press control
+ t. This will bring up a box around your little black area. Click and
drag on the dot circled (in red) in the image below. This will stretch
your bars out.
After i clicked and dragged, my bars looked like this:

Now, Go edit , rotate, 90 degress CW. Drag This bar to the left side
of your image and stretch it so it reaches from top to bottom. Now, duplicate
this layer. On the new duplicated layer, go edit, transform, flip horizontal.
Now, move your flipped bar to the right side. My final result looks like
this.

You can customize this tutorial for you own websites by applying it to
different original images, or altering the size of your selection. Have
fun and enjoy!
|
|